Last summer Edgar Chen (air.mozilla.org) built on an interactive shell for TaskCluster Linux workers, so developers can get a SSH-like session into a task container from their browser. We’ve slowly been improving this, and prior to Mozlando I added support for opening a VNC-like session connecting to an X-session inside a task container. I’ll admit I was mostly motivated by the prospect of giving an impressive demo, and the implementation details are likely to change as we improve it further. Consequently, we haven’t got many guides on how to use these features in their current state.
However, with people asking for TaskCluster “loaners” on IRC, I figure now is a good time to explain how these interactive features can be used to provide a loaner-on-demand flow for TaskCluster workers. At least on Linux, but hopefully we can do a similar thing on other platforms too. Before we dive in, I want to note that all of our Linux tasks runs under docker with one container per tasks. Hence, you can pull down the docker image and play with it locally, the process and caveats such as setting up loopback video and audio devices is beyond the scope of this post. But feel free to ask on IRC (#taskcluster), I’m sure Greg Arndt has all the details, some of them are already present in “Run Locally” script displayed in the task-inspector.
Quick Start
If you can’t wait to play, here are the bullet points:
- You’ll need a commit-level 1 access (and LDAP login)
- Go to treeherder.mozilla.org pick a task that runs on TaskCluster (I tried “[TC] Linux64 reftest-3”, build tasks don’t have X.org)
- Under “Job details” click the “Inspect Task” (this will open the task-inspector)
- In the top right corner in the task-inspector click “Login” (this opens login.taskcluster.net on a new tab)
- “Sign-in with LDAP” or “Sign-in with Okta” (Okta only works for employees)
- Click the “Grant Access” button (to grant tools.taskcluster.net access)
- In the task-inspector under the “Task” tab, scroll down and click the “One-Click Loaner” button
- Click again to confirm and create a one-click loaner task (this takes you to a “Waiting for Loaner” page)
- Just wait… 30s to 5 min (you can open the task-inspector for your loaner task to see the live log, if you are impatient)
- Eventually you should see two big buttons to open an interactive shell or display
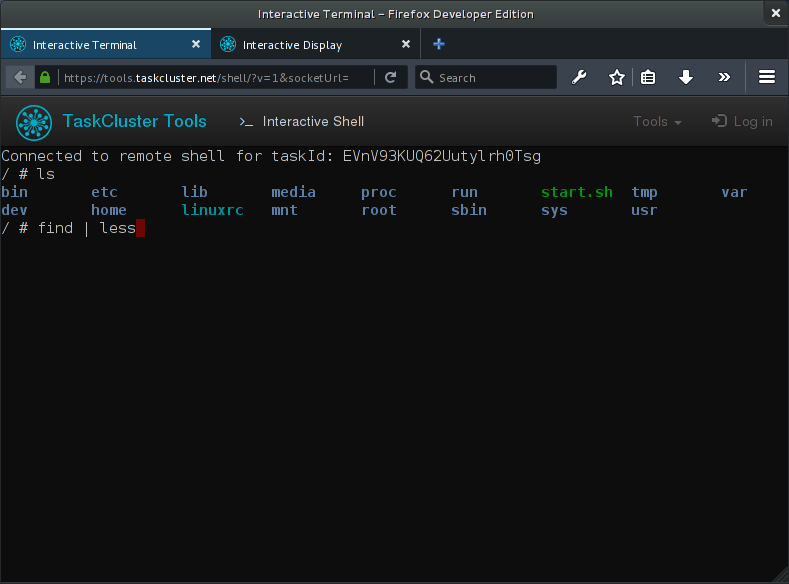
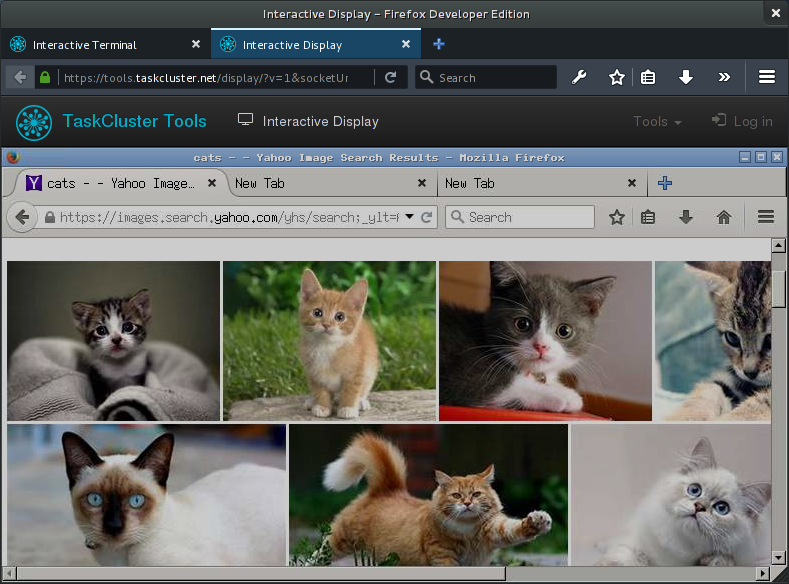
- You should now have an interactive terminal (and display) into a running task container.
Warning: These loaners runs on EC2 spot-nodes, they may disappear at any time. Use them for quickly trying something, not for writing patches.
Given all these steps, in particular the “Click again” in step (6), I recognize that it might take more than one click to get a “One-Click Loaner”. But we are just getting started, and all of this should be considered a moving target. The instructions above can also be found on MDN, where we will try to keep them up to date.
Implementation Details
To support interactive shell sessions the worker has an end-point that accepts websocket connections. For each new websocket the worker spawns a sh or bash inside the task container and pipes stdin, stdout and stderr over the websocket. In browser we use then have the websocket reading from and writing to hterm (from the chromium project) giving us a nice terminal emulator in the browser. There is still a few issues with the TTY emulation in docker, but it works reasonably for small things.
For interactive display sessions (VNC-like sessions in the browser) the worker has an end-point which accepts both websocket connections and ordinary GET requests for listing displays. For each GET request the worker will run a small statically linked binary that lists all the X-sessions inside the task container, the result is then transformed to JSON and returned in the request. Once the user has picked a display, a websocket connection is opened with the display identifier in query-string. On the worker the websocket is piped to a statically linked instance of x11vnc running inside the task container. In the browser we then use noVNC to give the user an interactive remote display right in the browser.
As with the shell, there is also a few quirks to the interactive display. Some graphical artifacts and other “interesting” issues. When streaming a TCP connection over a websocket we might not be handling buffering all too well. Which I suspect introduces additional latency and possible bugs. I hope these things will get better in future iterations of the worker, which is currently undergoing an experimental rewrite from node to go.
Future Work
As mentioned in the “Quick Start” section, all of this is still a bit of a moving target. Access is to any loaner is effectively granted to anyone with commit level 1 or any employee. So your friends can technically hijack the interactive task you created. Obviously, we have to make that more fine-grained. At the moment, the “one-click loaner” button is also very specific to our Linux worker. As we add more platforms will have to extend support and find a way to abstract the platform dependent aspects. S it’s very likely that this will break on occasion.
We also recently introduced a hack defining the environment variable TASKCLUSTER_INTERACTIVE when a loaner task is created. A quick hack that we might refactor later, but for now it’s enabling Armen Zambrano to customize how the docker image used for tests runs in loaner-mode. In bug 1250904 there is on-going work to ensure that a loaner will setup the test environment, but not start running tests until a user connects and types the right command. I’m sure there are many other things we can do to make the task environment more useful in loaner-mode, but this is certainly a good start.
Anyways, much of this is still quick hacks, with rough edges that needs to be resolved. So don’t be surprised if it breaks while we improve stability and attempt to add support for multiple platforms. With a bit of time and resources I’m fairly confident that the “one-click loaner” flow could become the preferred method for debugging issues specific to the test environment.
I’ve been using the interactive shell recently (usually by passing –interactive in my try syntax rather than the one-click loaner button, but I’ve use both), and it has been really awesome.
A couple of things I have observed:
– emacs/bash history users, watch out for Ctrl-P and Ctrl-N. Ctrl-P is a prefix of docker’s suspend hotkey sequence (Ctrl-P Ctrl-Q), and so you have to hit it twice for it to register. Or you can try to retrain your muscle memory to use the up arrow instead, rather than going half-speed. Ctrl-N opens a new browser window. I sometimes hit it several times in succession to go down a few lines, then get blasted with a bunch of empty browser windows opening. 😉
– these are CentOS 6 (?) images, and you have root access in the container. So you can do eg ‘yum install tmux’
– speaking of tmux, the multi-user aspect is a feature, not a bug. 🙂 It’s not first come first serve; everyone who clicks on shell.html gets a new bash process. Which means that you could use tmux to have multiple people sharing a terminal. (Note: I haven’t tried this. I *have* done it using a more complicated setup that I’m not going to go into here, but that was more of a side effect than my actual goal.)
– taskcluster tries to be nice and give you a script to run to reproduce the full test. I don’t recommend blindly running that script. You’re better off cutting & pasting a command at a time, leaving out the parts you don’t want (such as the part that shuts down and deletes the container.) If you’re like me, you’ll also need to get Docker working properly first before doing anything. In particular, watch out for versions of docker that create a 10GB volume. That may not be large enough. Newer dockers do 100GB, but it’s easy to have stale state that continues to limit you to 10GB even after upgrading.
– if you do end up doing multi-terminal craziness, you may need some environment variables set depending on exactly how you’re doing it. I use this line to “steal” the settings from $SOME_PROCESS: eval $(perl -0 -l012 -pe ‘s/(.*?=)(.*)/export $1″$2″/’ /proc/$SOME_PROCESS/environ)
Comment by Steve Fink — March 8, 2016 @ 5:25 pm