|
|
Jonasfj.dk/Blog
A blog by Jonas Finnemann Jensen
December 18, 2007 ECDSA: Elliptic Curve Digital Signature Algorithm
I den sidste uges tid har jeg skrevet studieretningsprojekt, og som overskriften afslører har jeg skrevet om Elliptic Curve Digital Signature Algorithm (ECDSA). Jeg har i projektet arbejdet med de matematiske aspekter af ECDSA, og har faktisk gennemgået alle de nødvendige algoritmer. Derudover har jeg selvfølgelig implementeret dem i C. Faktisk gik implementeringen hen og blev en hel implementering af ECDSA. Implementeringen hedder SimpleECDSA, og er skrevet oven på GMP, den er selvfølgelig også frigivet under GNU GPLv3.
Jeg synes selv projektet har været meget sjovt. Der er ikke ofte man får lov til at dykke så dybt ned i et emne. Nu har matematik niveauet i det jeg har arbejdet med så også været så højt at det til tider var direkte underholdende. Okay, måske jeg har en mærkelig form for humor. Men jeg synes nu alligevel det har været sjovt at lege med abstrakt algebra og algoritmer. Og efter dette projekt er jeg bestemt mere sikker på at jeg gerne vil studere datalogi næste år.
Hvis nogen skulle have lyst til at lære ECDSA eller implementere ECDSA, vil jeg mene at min rapport burde kunne danne grundlag for en praktisk implementering af ECDSA. Hvis ikke er der i hvert fald kildehenvisninger nok. Min rapport er skrevet på dansk i LaTeX og frigivet under CreativeCommons Attribution-Noncommercial-Share Alike 2.5. Både rapport og kildekode er selvfølgelig tilgængelig her:
Mod alt sandsynlighed er alle kommentarerne i min kildekode faktisk på dansk. Funktions navne og variabler er dog på engelsk. Først skrev jeg faktisk også alle kommentarerne på engelsk, men da det var et projekt på dansk valgte jeg alligevel at oversætte dem alle sammen, og der er faktisk rigtig mange. Mon ikke også jeg skriver en engelsk post om projektet og poster kildekoden med engelsk kommentarer der. Min viden om C er godt nok begrænset, men man er velkommen til at skrive en mail eller kommentar, hvis man har problemer med programmet, eller mod alt sandsynlighed skulle finde ud af at bruge den til noget fornuftigt.
September 15, 2007 First final OS X release, version 1.1.1
I’m happy to announce that we’ve finally ported the bugfix from the 1.1.1 release to OS X. As reported earlier all prior version of TheLastRipper are broken, due to minor changes on the serverside. This means that we haven’t had a working OS X version for about 2 weeks, the Windows and Linux versions were patched within 3 days, but since we don’t really have an OS X developers on the team this took a while longer. Anyway, it should work now, we’ve also added menu entries linking to the help pages on our wiki. Our beta was close, but not all done, now we think that we’ve got a fairly stable and feature complete version for OS X, therefore this release will be known as TheLastRipper for OS X version 1.1.1, yes it’s final not a beta.
September 5, 2007 Last.fm protocol version 1.2, unofficial documentation
As I promised a few days ago I’m releasing the unofficial Last.fm documentation that I’ve been developing in cooperation with Tobias Brennecke (tburny) and Matt Brown (blueboxed), two other Last.fm users. This new protocol for last.fm is very interesting, it offers a small playlist instead of one long audio stream, this is nice since metadata is included in this playlist. The unofficial documentation is available from TheLastRipper wiki, here. All the operations should be possible to do with Firefox.
Anyone familiar with the old protocol (version 1.1) knows that Last.fm gave you an mp3 stream, and a place to go if you wanted to request the metadata associated with the music currently playing. This wasn’t very nice, because you had to guess when a new song started, I know that the last metadata response contained information about how long the song was, but you didn’t know exactly when the song was started. Alternatively it was possible to search the stream for mp3 headers, which gave you precise information about when a new song started. But that required some computing. The new protocol just returns an XSPF playlist with mp3s and metadata, now that is very nice.
September 3, 2007 All prior versions of TheLastRipper broken!
I regret to annonce that all current prior versions of TheLastRipper are broken. It seams that Last.fm dropped support for had a bug in their 1.1 protocol, this weekend. All streams optained from this protocol returns “HTTP/1.0 667 Not enough content left to play this station”. I think it’s a shame, considering the amount of opensource audio players out there with playback support for Last.fm version 1.1. Since all of these audio players, including TheLastRipper have been broken.
Nevertheless, I and some other last.fm users have developed an unofficial documentation of the new last.fm protocol version 1.2. I’ll release it shortly, and I’d expect a implementation of this new protocol for TheLastRipper to start rather shortly too. If you want to stay updated on this issue, you can subscribe to issue 63. You do that by clicking on the star.
UPDATE:
Last.fm didn’t drop support for 1.1 protocol it was just gone for the weekend + Monday. Though a minor change in the login scheme caused TheLastRipper to freeze, this issue have now been fixed, and latest release of TheLastRipper works (Version 1.1.1). We’ll still be working on an opensource implementation of the Last.fm 1.2 protocol.
August 30, 2007 Volume normalization with Amarok
Some users of TheLastRipper has requested integrated volume nomalization (Issue 61). While I admit that I’ve noticed the volume changes between tracks, I’ve never really bordered to find a solution. But since others had similar issues, I decided to take a look at it. I ended up looking at ReplayGain, a project that aims to add a tag, containing volume information, to all songs. Then read the tag at playback and determine the volume. Though the value of the tag must be calculated first.
As this seams like a big feature, and as argued by Andreas in the issue tread, it’s probably not a feature for TheLastRipper. Nevertheless it doesn’t mean that the problem should be fixed, just that it should be done elsewhere. This is also good, since you entire music collection doesn’t necessarily origin from TheLastRipper. The solution is to implement this feature at playback level, meaning in your audio player.
For those of us running Ubuntu and using Amarok, this can be done easily. First open Amarok, choose “script-management”, Click download new scripts. This will open a dialog showing the newest, most popular and most downloaded script for Amarok. Just install the script called ReplayGain. Once this is installed you’ll have to install some dependencies with Synaptic. I’ll try to list those I think is needed: python-kde3, mp3gain, vorbisgain, flac, python-xml
If you enter the script-management in Amarok again, you can enable the ReplayGain script. Enable it, select it and click “Settings”, you can tweak the ReplayGain script a little here. Once your done with that leave the settings, and ReplayGain will print a small popup, telling you which optional dependencies you are missing. I’ve probably forgot to list some of them, you may find them in Synaptic if you think you need them. Though I haven’t found “aacgain” or “replaygain” in the Ubuntu repositories.
Well, you don’t need “replaygain” or “AACGain”, unless you, like me, have AAC music. Actually I’ve just bought my first AAC music from iTunes. I haven’t used iTunes before, but I thought I’d give it a try since they started releasing DRM-free content. So I installed iTunes in my virtual machine, and copied the AAC files back to my Ubuntu system after they were downloaded. First I must say, the quality of iTunes plus files are very good, and the files has ID3v2 tags (other mp3’s I’ve bought online did!). It’s sad that iTunes doesn’t run on Linux, Apple could at least offer a web interface for iTunes plus.
Well, if you have AAC encoded music, you’ll need AACGain, it’s not in Ubuntu or Debian repositories. Actually I couldn’t find any .deb packages for it anywhere. So I decided to make my own. You may download my ACCGain package here. Feel free to contact me if you want the source package.
Once you’re done installing dependencies, and have enabled the ReplayGain Amarok script, you can right click in your playlist and choose “Apply Replaygain tags”, I selected “To entire collection using album tags” it took a while but the volume was automatically determined by Amarok afterwards.
August 19, 2007 Release of TheLastRipper 1.1.0 for Windows and Linux
Like I wrote yesterday, a release of TheLastRipper have been in the workings for a while. Now the final details have finally been solved and I’ve released TheLastRipper for both Linux and Windows. Among some of the most interesting changes are:
- ID3v2 support (
Issue 5)
- International characters (
Issue 4)
- Perfect clipping of songs (
Issue 6)
- Fix tab-index and improve UI (
Issue 41)
- Handle exceptions when launching browser on windows (
Issue 45)
- General exception handling dialog (
Issue 46)
- Support for http proxies (
Issue 44)
- Better overall stability
You may download the new release of TheLastRipper from our project page now!
August 18, 2007 TheLastRipper 0.9 Beta for Mac OS X, with Cocoa interface!
A new release of TheLastRipper have been in the workings for a while and now it just about to be done. Among some of the new features are:
- Perfect clipping of songs
- ID3v2 tag
- Support for proxy settings
- Better threading
- International character support
- Many minor bugfixes
These features have been under development for a while and the Windows and Linux clients in SVN already have these features, they will be release as 1.1 very soon too. But last weekend me (Jonas) and Rene of TheLastRipper developer team, decided that it was time to get a beautiful port for OS X. So we started out with the 1.1 codebase from SVN and installed XCode, Mono and CSharpXcodePlugin on a Mac. Then we wrote one of those simple “hallo world” applications in Cocoa#, after becoming a little familiar with Interface Builder and Cocoa#, we started the development of a client using Cocoa#.
And even though the Cocoa# bindings aren’t complete, the weird behaviour of Interface Builder, minor bugs in Xcode and the fact that we wrote most of it during a hangover, the result compiles (sometimes), and works fine too. This version is now being released as TheLastRipper for Mac version 0.9 Beta, once it’s been tested a little more and the last details have been fixed it will be released as stable too.
Now a bit about Mac and Mono based development. First of I’d like to say that I’m not a Mac user and never have been, I’m a Linux user with years of Windows experience, now practiced in a virtual machine for legacy applications. Now getting CSharpXcodePlugin installed and doing the LetterCounter video tutorial is definitively a good start. But it’s difficult to find documentation for Cocoa#, I had to go with what I could get from the assembly cocoa-sharp.dll using Monodocer. The result was that we copied the cocoa-sharp.dll to Windows and added it as reference to a SharpDevelop project to enable intelliSense, since that was basicly all the documentation we could find. But once that was done, developing the actual code on Windows and the interface on OS X was actually pretty easy. Especially with TheLastRipper since all the logic is in a platform independent .dll, which means we only had to write a little clue code. Of course you need to get hang of how Cocoa and Interface Builder works, but once you’ve got that, it’s certainly possible to work with… Even though Mono on Mac isn’t as easy as it is on Windows or Linux.
July 27, 2007 Min installation af Ubuntu 7.04 Feisty Fawn
Jeg ved godt at feisty fawn har været ude et stykke tid, men jeg ville ikke opgradere under mine eksamener og lige pludselig havde jeg sommerferie og sommer job… Derfor var det først her i weekenden at jeg fik installeret feisty fawn. Jeg valgte installation frem for opgradering, da jeg havde leget lidt mere med min edgy installation end hvad godt er.
Installationen var nem og hurtig, det hele gik meget smerte frit. Denne gang var network-manager allerede konfigureret lige efter installation. En lille sjov detalje:
Kort efter at have installeret Ubuntu kunne jeg læse på Newz.dk at toshiba havde tilbage kaldt flere batterier. Senere på aften havde Ubuntu opdaget at min laptop var en toshiba og den gav mig en fin advarsel om at mit batteri kunne være tilbage kaldt. Advarselen så sådan ud:

Som det kan ses var den på dansk, og kom forholdvis kort tid efter nyheden om batterierne. Jeg synes det er en fed service fra Ubuntu. Jeg kan hilse og sige at min Windows partition ikke kan finde ud af at advarer mig, og det selvom den er fuld af bloatware fra Toshiba (Bruger den kun til legacy applikationer og end smule Windows udvikling). Det skal lige siges at mit batteri ikke var tilbage kaldt, men det var tæt på.
Det eneste problem jeg havde efter installation af Ubuntu Feisty Fawn var sove funktionen, eller det der hedder “afbryd” når man logger ud at gnome, når jeg kom tilbage efter en suspendering til ram virkede det trådløs netværk ikke. Jeg kunne ikke komme på trådløst netværk med min IPW2200. Jeg kiggede lidt på nettet og det vidste sig at hvis man tilføjer “ipw2200” til modules i /etc/default/acpi-support, så bliver driveren reloaded efter suspendering. Altså ALT+F2 skriv “gksu gedit /etc/default/acpi-support” ENTER, find linjen MODULES=”” og ændre den til MODULES=”ipw2200″ og gem.
En anden lille ting man måske kunne tænke sig at gøre efter installationen af Ubuntu, er at installere pam-keyring. Gnome-Keyring spørger normalt om din hoved adgangskode til nøgleringen, hver eneste gang et program skal have fat i et password som er gemt. F.eks. network-manager der bruger gnome-keyring til at gemme passwords i. Ved installation af pam-keyring vil standart nøgleringen blive låst op ved login. Det er vigtigt at din nøglering har sammen password som det du bruger til at logge ind med. Derefter skal du installere pam-keyring med synaptic eller bare “sudo apt-get install pam-keyring”, og tilføje følgende linjer til filen /etc/pam.d/gdm :
auth optional pam_keyring.so try_first_pass
session optional pam_keyring.so
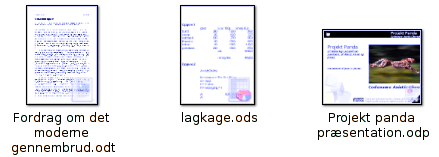
Hvis man går lidt op i hvordan systemet ser ud, kan man installere en thumbnailer til openoffice filer. Jeg fandt en god en i en tråd på ubuntuforums, den benytter et thumbnail af openoffice dokumentet og sætter et lille gennemsigtigt ikon hen over billedet, så man kan se om der er tale om et tekst dokument, en præsentation eller et regneark. Jeg har opsummeret tråden fra ubuntuforums til et lille arkiv med installation instrukser. Resultatet ser sådan ud:
May 26, 2007 CMS3 – Mit afsluttende projekt i Programming C
Nu er jeg snart færdig med mit andet år på HTX, og afslutter dermed programmering C, altså som fag på HTX. Vi kunne skrive vores afsluttende projekt i enten php eller delphi, og da delphi i mine øjne er noget forældet Windows orienteret skidt, valgte jeg selvfølgelig at arbejde med php. Da jeg ikke lige stod med idéen til en genial web applikation bestemte jeg mig for at lave et simpelt CMS system.
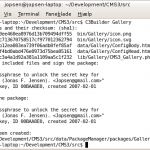 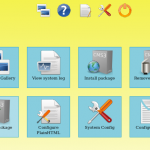 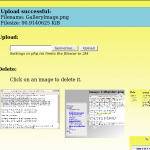 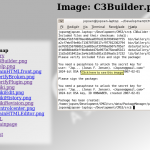
  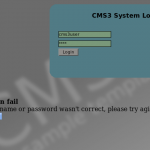 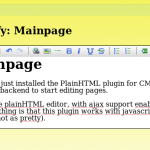
 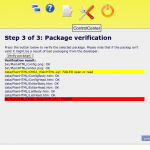 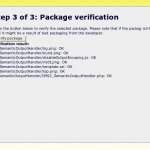 
Dette blev til CMS3 med en web 2.0 backend, hvor alle features skal installere som plugins. Plugins installeres fra pakker, som kan verificeres med digital signatur både før og efter installation (Til dette formål benyttede jeg GPG). CMS3 er overordnet set færdigt, der er nogle små ting som kunne virke bedre og laves mere fornuftigt, f.eks. er der ingen forhindringer mod SQL injections. Oprindeligt var det meningen af systemet også skulle have en web 3.0 frontend. Men dette blev for komplekst og havde ikke ret meget med programmering i php at gøre, så jeg valgte at nøjes med en XML/XSL template, ved siden af HTML templaten.
Det har været et rimeligt omfattende projekt, som dog er blevet nogenlunde veldokumenteret og har fået en fin rapport. Selvom rapporten formentlig består af en masse ævl, stave fejl og dårlige formuleringer. Men da jeg ikke rigtigt har noget at bruge systemet til, kan jeg jo ligeså godt frigive det, under GNU GPL. Hvilket jeg hermed vil gøre: download kildekode, dokumentation og rapport. Så ved jeg ikke om der findes nogen som kan bruge det til noget. Hvis du vil vide mere, kan du finde en lidt grundigere synopsis i docs biblioteket på den tarball, du kan downloade. Det skal lige siges at systemet ikke er under udvikling mere, så denne release er kun for folk som vil lege lidt. Alt leg med systemet er på eget ansvar, men man er selvfølgelig velkommen til at sende mig en mail hvis man får problemer, det kan ske jeg kan hjælpe…
April 8, 2007 Howto: Export Monodoc to GoogleCode Wiki
Lately I’ve been working on a small project called TheLastRipper, hosted on Code.google.com. A few days ago I started wondering about how to document a Mono/.Net application, not because there’s much to document in TheLastRipper or worth documenting for that matter. Anyway I ended up looking at some pages in the Mono wiki, it seams the best way of generating documentation, wasn’t by using documentations comments handled by the C# compilers /doc argument. This is the method most (former) Windows developers are familiar with, once documentation comments have been exported to Xml by the C# compiler, it can be generate into a CHM file using programs like ndoc. Instead the Mono project generates documentation from binaries, which gives them Xml files containing all methods, classes etc. Later on you’ll then be able to fill out the empty comments. This way documentation of code development have been completely separated.
You can read the discussion between the two different documentation formats in Mono wiki. I’ve chosen a middle path, by exporting my current documentation comments to monodoc. I won’t discuss the process of documenting an application using monodoc, the process is already well documented in the Mono wiki article I’ve linked to a few times. What I will discuss is how to parse you monodoc Xml to WikiMarkup that can be hosted on GoogleCode. Mono already comes with an application to parse monodoc to plain html, called monodocs2html. I’ve made a modification of the application, resulting in monodocs2wiki. If you have your documentation as monodoc Xml you can parse it to WikiMarkup, by doing following:
- Download: monodocs2wiki
- Extract the
- Checkout the /wiki/ directory from your GoogleCode svn repository
- Run: ./monodocs2wiki -source:./docs/ -dest:./wiki/
Where ./docs/ is the base path of your monodoc xml files (Containing an index.xml file). And ./wiki/ is the /wiki/ directory you checked out of svn.
- Commit your /wiki/ directory to svn, and view you documentation in you GoogleCode wiki.
The /wiki/ directory of your GoogleCode svn repository, contains all the pages in your GoogleCode wiki. You may wish to change a few things in the template, perhaps using a different label than just Documentation. Take a look in the README file if you what to know more about customization. The current template in the monodocs2wiki application, uses the markup used in the wikies at Google Code. You may modify it, I think it would be easy to port it to another WikiMarkup. Any questions, feel free to leave a comment or mail me…
« Newer Posts — Older Posts »
|
|


